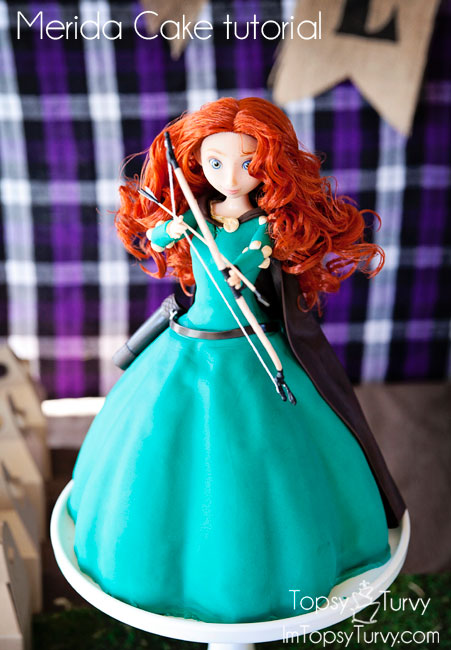
I was never a fan of “doll” cakes, but a few years ago when I got asked to do the Tiana cake I fell in LOVE with doing the Disney princess cakes! I Followed up with the Rapunzel cake tutorial, and so when my niece decided to have a Brave party I begged to do a Merida Cake! I’m thinking about doing all the princesses, what would you like to see next?
My sister alwasy throws a GREAT party, so head over to her blog to see all the full Merida Party amazing treats, details and pictures of the party! I love the invitations and my little girl loved the bow and arrow favors, and teddy grahams.
I always start my cake designs with sketching out the full cake, then I start by writing out every step and planning it all before I even get started. That way nothing get’s forgotten, and I don’t waste a lot of time doing something in the wrong order.
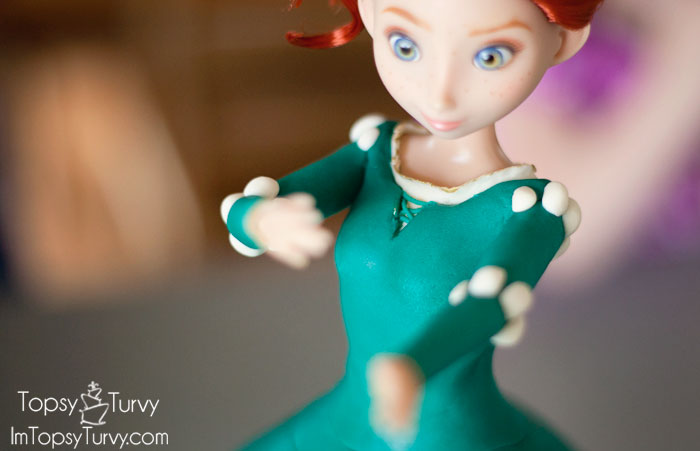
Sometimes the details get covered up by the next layer, like the neckline details, but it’s worth doing underneath right for that little peek here and there! I also have to think about HOW I’m going to do some parts of the dress.
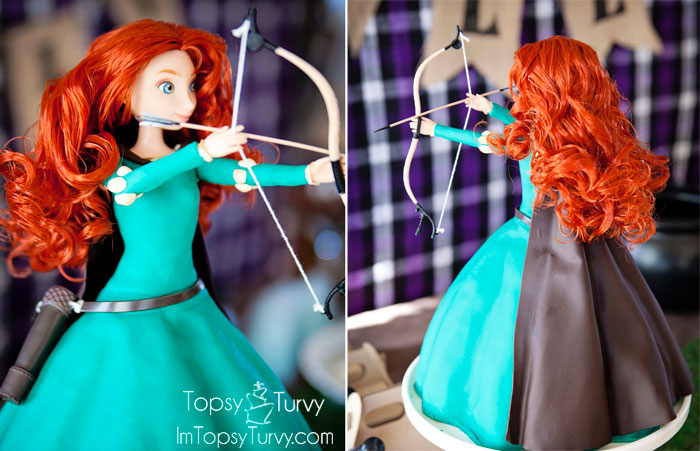
The cape was a challenge, how to have it “flow” and not just be stuck to the dress all down the back. I love how it turned out! Merida wears a pretty simple dress, but sometimes the most simple can be more challenging because there isn’t a lot of detail to cover up problem areas.
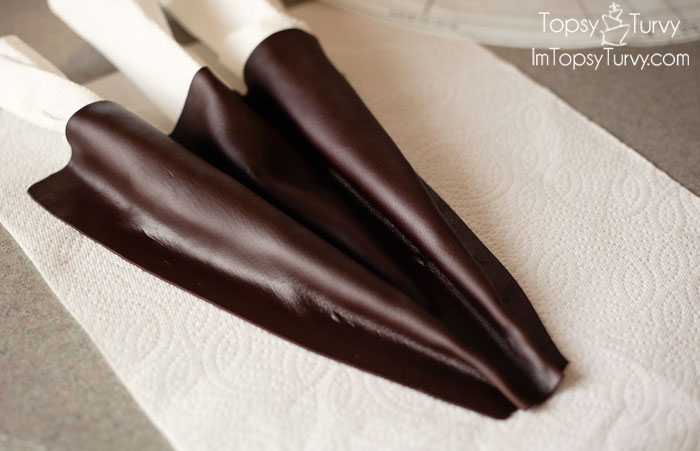
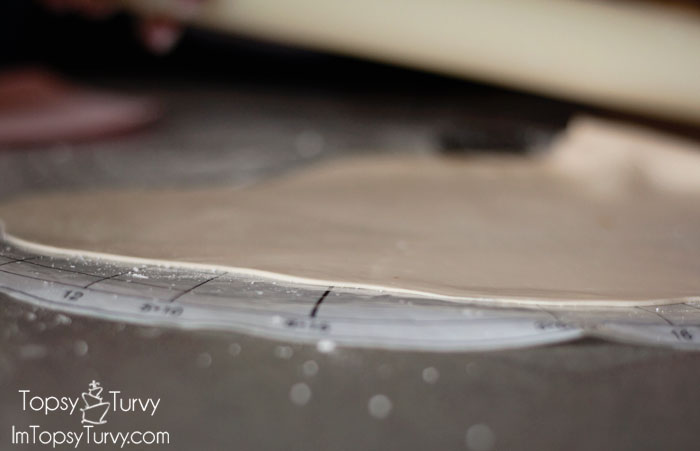
So I started with the cape to give it time to dry. I rolled out modeling chocolate, and shaped it how I wanted it to lay in the back, creating ruffles, and holding it all in place with rolled up paper towels. Then while I worked on the rest of the doll it was drying!
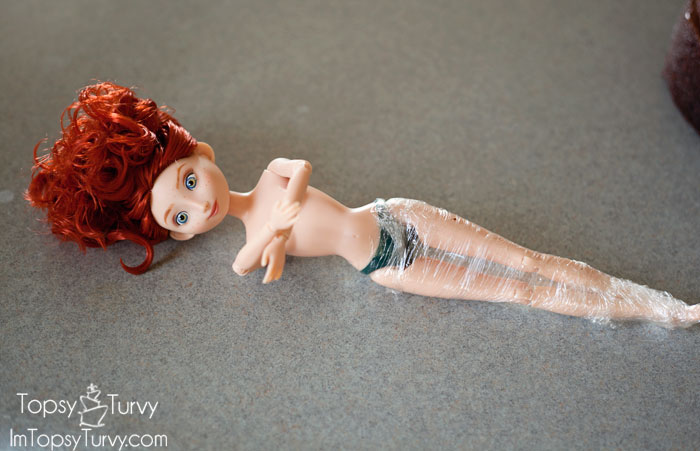
You can get the Merida doll here. I got her naked and wrapped her legs in saran wrap for two reasons, 1. food safety, and 2. keep her legs together (easier to go into the cake that way). Also I rubber band her hair up and out of the way!
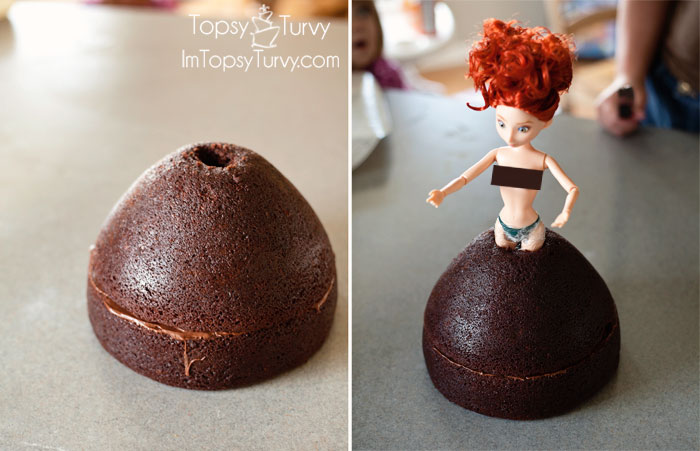
The next challenge is that Merida’s dress is actually A-line and very thin, but to carve it down that much there wouldn’t be much cake… So I started with the standard wilton wonder mold pan but its always a bit short for the dolls with legs so I added an 8 inch cake layer below (stuck together with my Ganache)
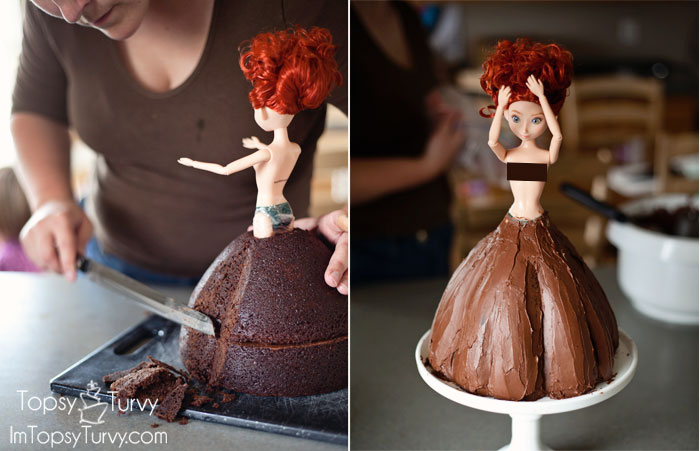
Then I started carving away, I started with a few deep, large, cuts, then filled in between with a few smaller, shallower cuts. Then smoothed out each of the cuts when I was happy with them and then frosted it with my ganache, filling up the gap near her thighs.
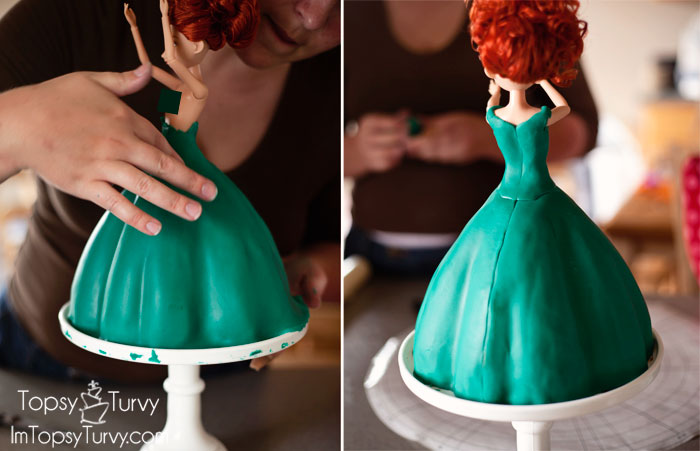
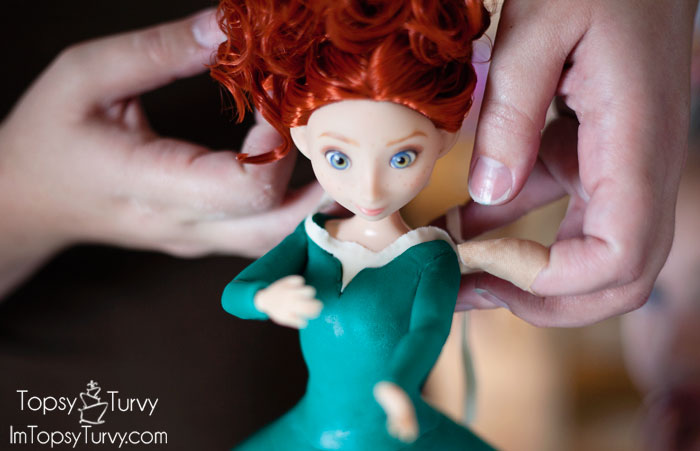
Next up? the Fondant. Since I put Merida in first I couldn’t just cover it top down, so I wrapped it with a seam in the back, knowing the cape would cover the seam in the end. To make the bodice I cut out a rectangle, made some arm holes and wrapped it around her bodice, cutting the neckline, waist and creating a seam in the back.
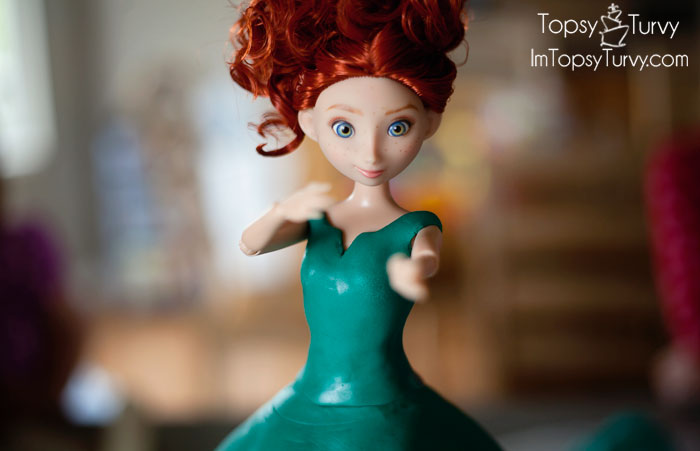
Make SURE you adjust her arms where you want them now so as you position the bodice the straps lay right where you want them. If you try to move the arms later you’ll cause cracking in the fondant because it starts to dry.
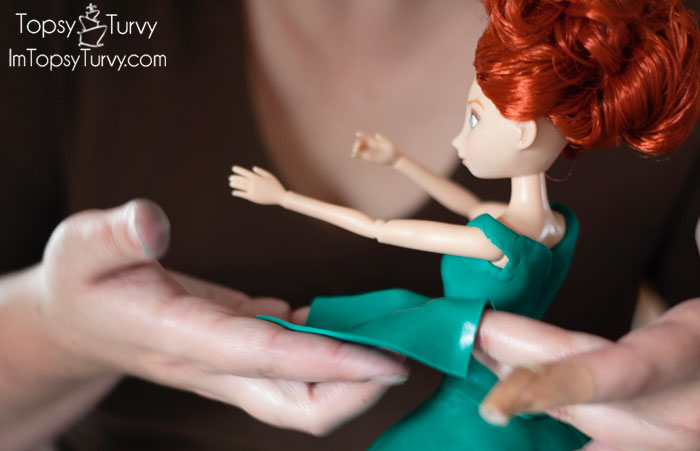
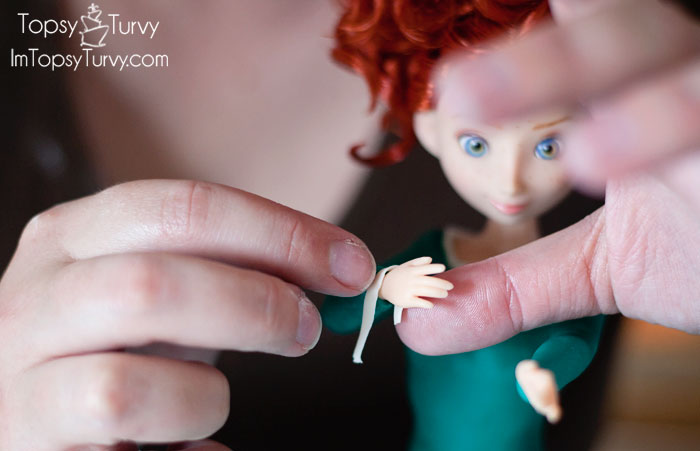
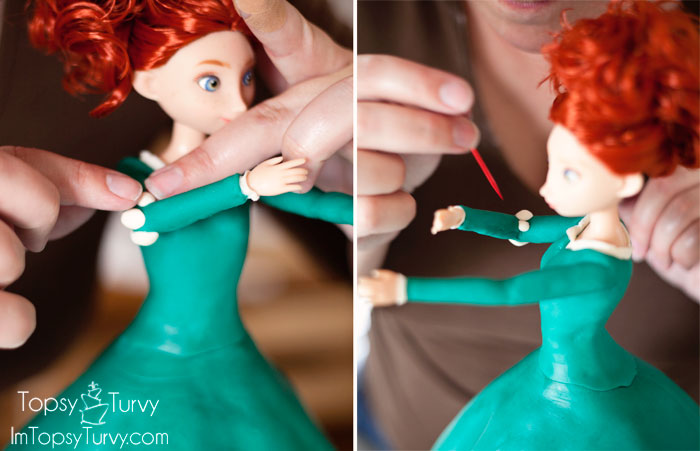
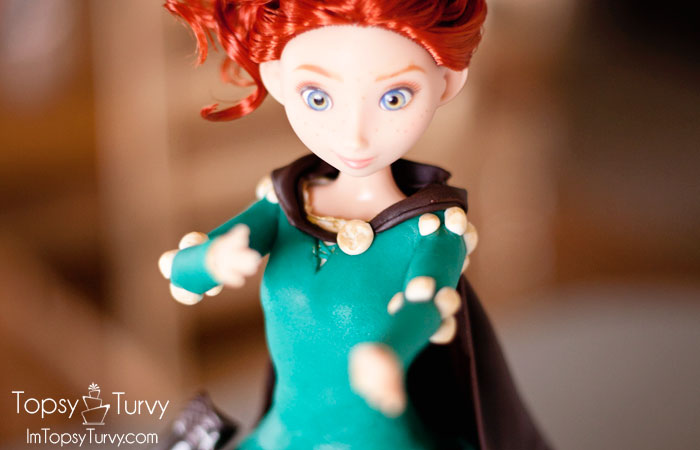
I decided rather than try to create the “underdress” then layer the sleeves over the top to create the sleeves first and add the “poofs” later. Roll out a VERY thin layer of the same color fondant and cut out a small rectangle for each arm. I use vodka, but clear vanilla works too, to stick the fondant to the doll.

Wrap it arond the arm, pressing it into place and cut the excess off leaving the seam underneath to hid it. I use a VERY sharp knife, I prefer cutco, just don’t cut your fingers (like I did). (check out my niece carefully watching how it was going)
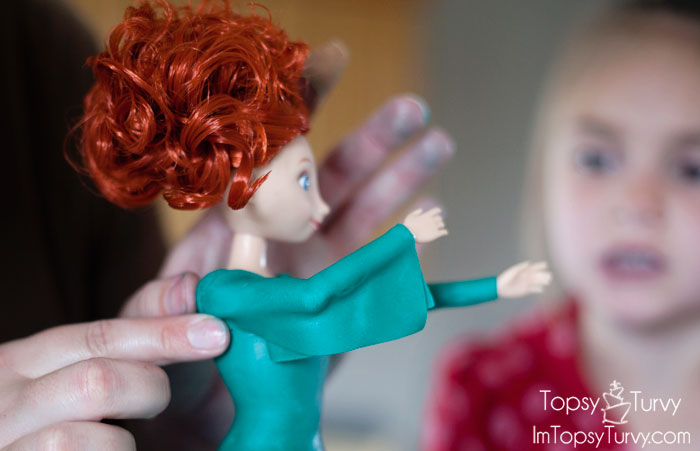
Do the other arm, cutting and pressing the shoulder seams together while the fondant is still soft and pliable. If it starts to not stick together add a bit of the vodka/clear vanilla.
Now for the RUFFLES! Roll out some ivory fondant VERY thin…
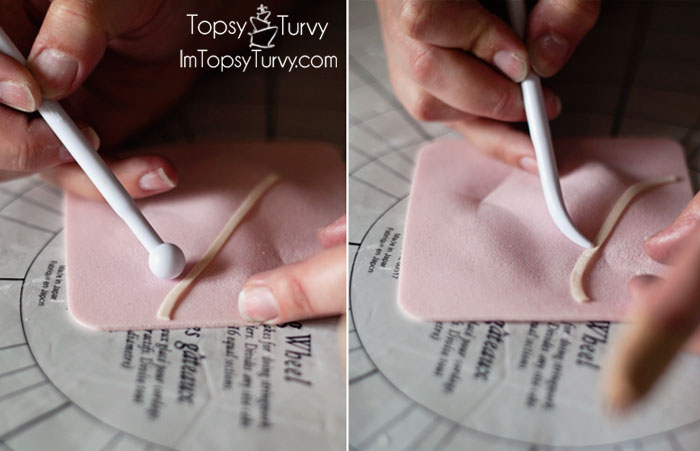
Cut some VERY thin strips, and using a ball tool thin one edge, because it’s so small it didn’t ruffle as much as I’d wanted, so I also too the other end of the ball tool and pulled some ruffles out.
Add some Vodka/clear vanilla around the collar of the dress, and carefully wrap the collar around. Create a seam in the back, and then lift up the ruffles away from the doll until your happy with the look.
Do the same thing around the wrists, remembering to seam underneath the arm, and pulling open the ruffles.
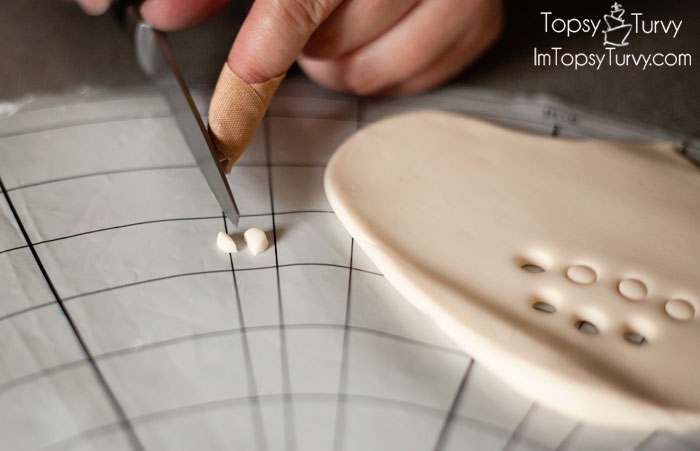
Now for the poofs!!! Roll out the fondant semi thick and cut circles (using my large round tip) and cut them in half (some even, some small/large portions)
Now it’s time to start adding poofs! Think about your placement. Where the elbow is bent the outside poofs should be larger, while the inside poofs should be smaller. Again attaching with the vodka/clear vanilla
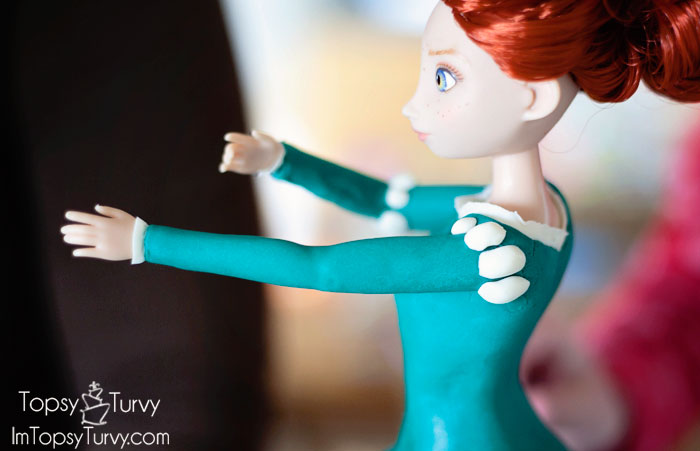
same thing with the shoulder, the outside of the shoulder will be longer, while the closer you get to the armpit it will be shorter and smaller. While the straight elbow will be about the same size all the way around!
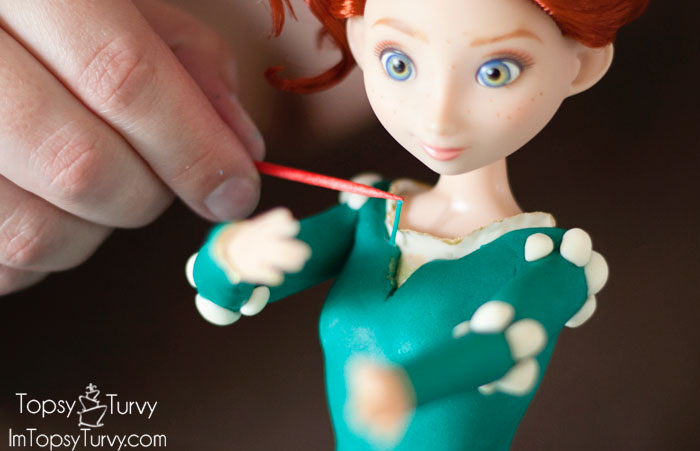
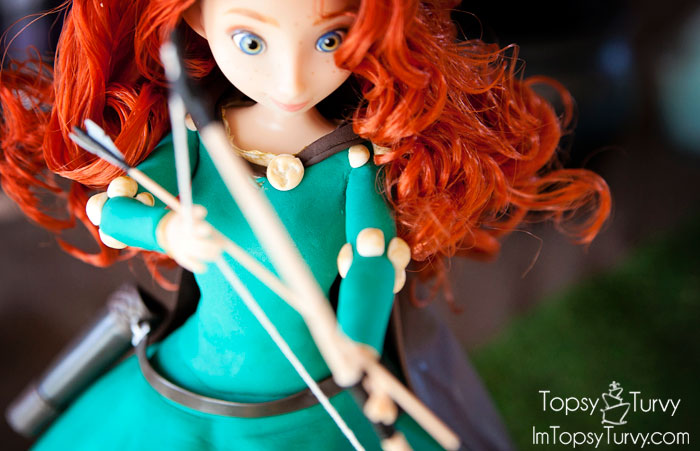
I have a clay extruder I use to extra small details like these itty bitty “strands”. I cut them with the tip of a toothpick, that way they kind of “stick” to it and I bring it up to the V-neck, placing the strands where I want them.
Creating the criss cross closing! This ends up getting covered so if you don’t want to bother with it it will not be a big deal, but I’m a perfectionist and all about the details… so I did it!
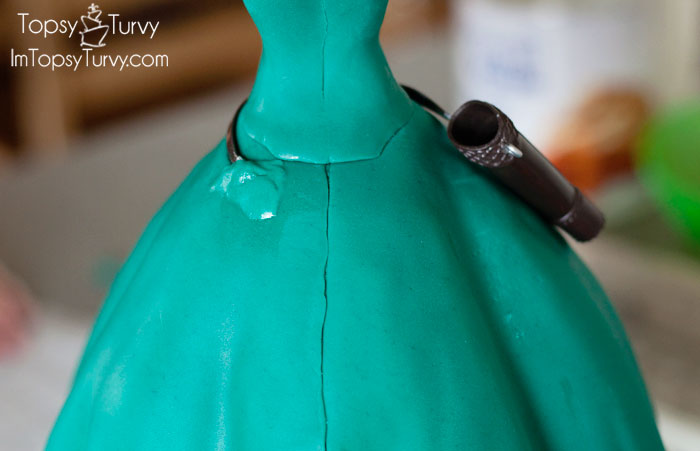
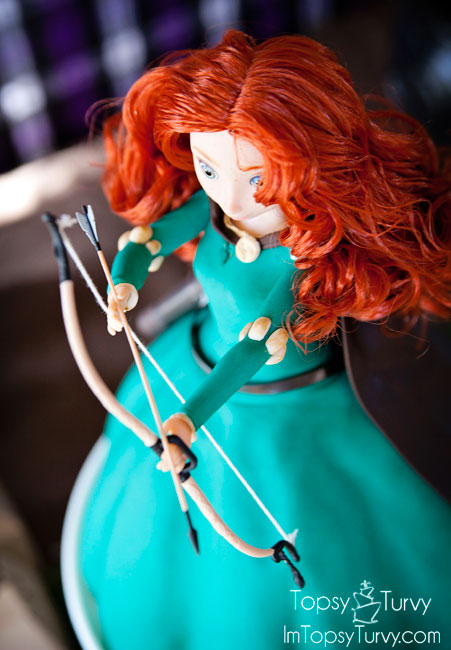
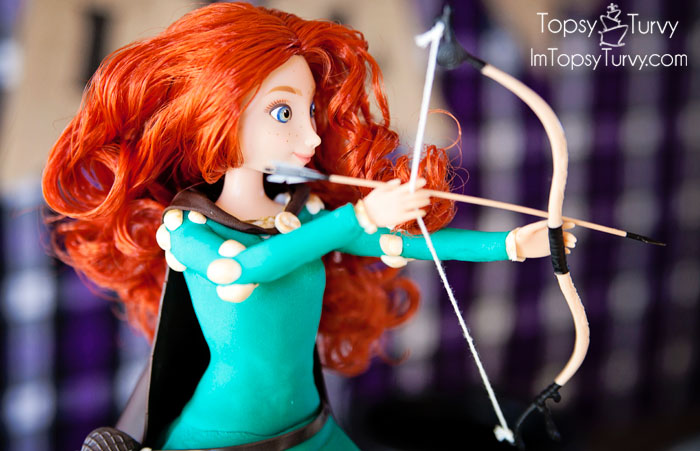
I decided just to use the arrow case (seriously, it has an official name, what is it called?) the doll came with, along with the bow and arrow simple because they are so thin I didn’t want to risk making something that would just crumble. BUT the doll is super thin, so it didn’t fit around the waist!!! GAH. I placed it where I wanted it, on her hip, and wrapped what I could around, then STUCK it to the back of the dress with some extra fondant (again, getting covered with the cape)

To add some detail I took some gold edible paint and painted the ruffles and poofs for some extra depth, and more of a homespun cloth look. I loved the way it turned out.
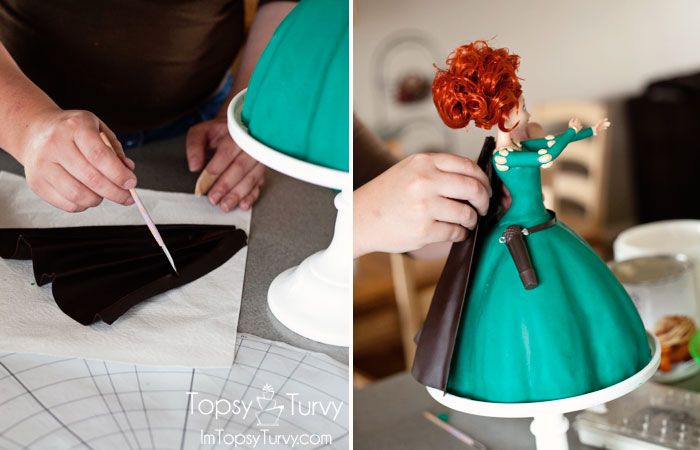
And now time for the part I was most nervous about, how would the cape hold up… I turned it over (it was nice and dry by this point) and painted the back with vodka/clear vanilla) then holding it where I wanted it placed it in the back of Merida! I put it over to the side, as hers doesn’t seem to be very even, more over the bow holding arm, less over the arrow pulling back arm (does that make sense?)
It worked GREAT!!! I touched enough of the doll (shoulder blades and skirt) that it didn’t matter that it didn’t touch along the back and waist!
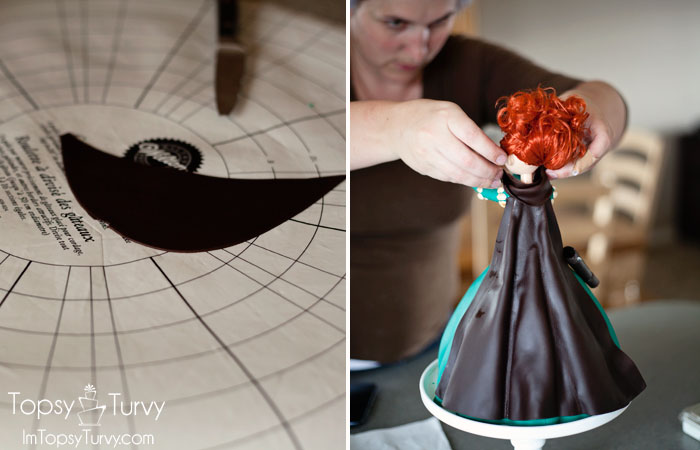
for the top, the cake I cut a moon shape out of the modeling chocolate and wrapped it around the top of the cape and over the shoulders!
I didn’t want the clasp to cover my criss cross so I turned it over to the side a bit ad added an ivory fondant medallion. Then painted over it with the gold paint!
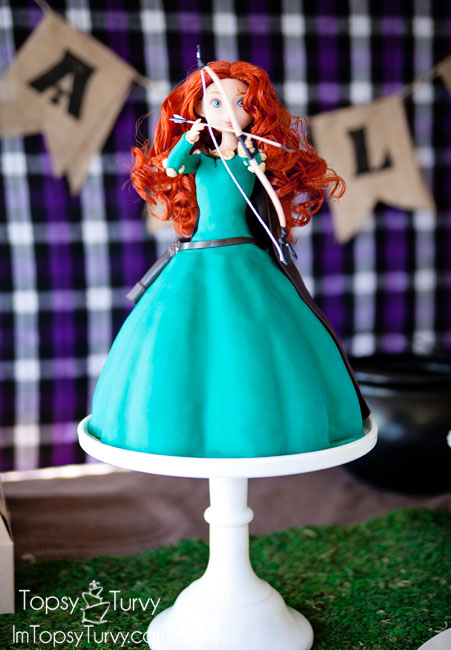
Let her hair down, add the bow and arrow and she’s DONE!!! What do you think? I am SO happy with how she turned out!
So if I do more Disney princesses which would you like to see next? Don’t forget to check out the rest of the Merida party at my sisters blog!
[riview showtitle=always tags=princess-cakes size=150x150 lightbox=0]


Stefani
Gorgeous cake!! Great tutorial and I love your attention to detail! I think the arrow “holder” is called a quiver, but I could be wrong -I’m definitely not an archer! 🙂
Ashlee
GAH!!! Thanks, I knew it, I just couldn’t remember for the life of me! And thanks, I really enjoy making these princess cakes!
Leisha @ Homemade Toast
Wow Ashlee – this is incredible! I can not even believe your attention to detail. Amazing!
Ashlee
awww thank you so much!
Katie Ann
This is so cool!!!! By the way the “arrow case” is called a quiver. The only reason I know is cuz I have four brothers and they have me watch all their boy shows!
Ashlee
doh!!! I knew that, thank’s, I totally could NOT remember when I was writing this! Thank you!
Martha T
This is perfect timing because I am doing my first Barbie cake in a couple of weeks. Thanks for sharing all these wonderful hints. I love your Merida … even though I don’t know who she is, my daughter is expecting my first granddaughter, so I may be learning!
Ashlee
your welcome, I did one a few years ago too, for different sleeves and bodice options (rapunzel) let me know if you have any questions!
Connie
you have such talent! ! Thanks for sharing with us. pining for future reference!
Ashlee
you are so welcome! I’m so glad when people enjoy it, AND even more when they do it themselves, let me know if you ever try it or something similar!
Cynthia @kindasillymommy
Wow! Super impressive! I love it..
Ashlee
Thank you so much! they are so much fun to make and see the birthday girls face!
Tia @ Events To Celebrate
You do such beautiful work, it is so impressive! I would love to feature you on my party planning blog and share your incredible work with my readers. If you’re interested, contact me at eventstocelebrateblog@gmail.com
Ashlee
thank you for your interest, I allow one image and a link back to my site as a feature. Please don’t share full tutorials, more than one picture, or recipes.
jackie
Wow, loved it. I have just started taking some clases.I love the art of baking.
Ashlee
Enjoy! I loved taking classes, and now I love teaching! It’s a fun hobby to get into (although an expensive one)
Liza @ Views From the 'Ville
I have to say that’s one of the most beautiful cakes I’ve ever seen. You have AMAZING talent! I showed the picture to my husband and didn’t tell him what it was. He asked me if I was ordering a doll for our daughter and I said it’s a CAKE. He was shocked, it just looks too awesome.
Ashlee
wow! Thank you so much. I love it when people don’t think it’s really a cake, those are my all time favorite ones, the pumpkin, or the pot of gold, etc…
Carol
I really love your work! The first cake I did with a LOT of help from your tutorial was Rapunzel (for my daughter). It wasn’t great but I got the idea. This year I was able to do Tiana and it came out beautifully. I wish I could send you a picture. Thank you so much for sharing and opening my mind up to endless possibilities for the doll cakes. I live in South Africa – so far from you, yet you have managed to put a smile on my daughters face by teaching her mom! Bless you
Ashlee
you can totally send me a picture imtopsyturvy at aol dot com. You are so welcome, I LOVE it when people make a cake from one of my tutorials! I love teaching and sharing.
lety grro
Me super encanto, ya habia visto otras cosas pero quizas me anime por esta, mas practica y rapidisima de hacer,,, la pondre en practica este 20 q es el cumple de mi gorda, gracias por compartir 😀
Ashlee
Thank you and your welcome!
LInda
Beautiful cake! I have to do a Belle cake at the end of november, i have the same mold (wilton)… how many cake did you put on your mold? I mean, I will do it with a box cake… so do you think il will need 1 box cake into the wilton mold?
Ashlee
I don’t use box mixes, they don’t hold up with the weight of the fondant or the doll being place inside. They tend to crumble and fall apart if you mess with the cake structure at all. I use dense cakes, esp if your going to do any carving like I did here. That said one batch, about 4-5 cups, of batter fit into the mold. if you want it taller like me you can add another 8 inch layer.
LInda
Thank you so much for your explanation. I made a try last week and the cake did like you told. I did another try yesterday with a real cake and seems better, I put it on the freezer today, I will try to do some carving tonight after work. Hope it will be great 🙂
Ashlee
how did the carving go? Let me know, and if you have any other questions!
LInda
Finaly, I didn’t do carving at all 🙁 I was too stress for doing it so I did this
https://www.facebook.com/photo.php?fbid=10152061441027112&set=t.723827111&type=3&theater
Sorry, the picture is not very clear…
Maybe next time I will try do carve it 😉 thank you for your help 🙂
Ashlee
it won’t let me see your personal page, sorry. But I hope you enjoyed it!
Jane
I recently found your website, and I must say I love your cakes! My daughter requested Merida be on her cake for her birthday this year and I was having a hard time figuring out what to do until I saw this! She would absolutely love this! I just hope I can pull it off! I’ve made some cakes Ive been proud of but im still very much an amature! Thank you for your inspiration!
Ashlee
Thank you so much! I love doing it, working on tutorials for the Frozen sisters now! Let me know how it goes or if you have any questions while your working on it!
Michael
Thank You so much for this. My 3 year old daughter loves Merida, and I had this idea for her birthday. I am not very good at baking (yet) but want to make my little girl super happy. This is exactly what I was looking for. You did an amazing job. I hope mine at least resembles Merida 🙂
Ashlee
you are so welcome! I hope you find it easy to follow and enjoy making it! Baking and cake decorating is SO enjoyable! I’d say just give yourself enough time, when your pressed and stressed that’s when things go wrong! You’ll do GREAT and no matter WHAT it looks like she’ll LOVE it! Yay you! Send me a picture when your done!
ChrisO
The arrow holder is called a quiver and your cake is outstanding, I love it thanks for the tutorial it will be used quite a bit.
Ashlee
of course it is! GAH, thanks! I’m working on tutorials for the new Frozen sisters next! I’m glad people love these fun princess cakes!
T-Cali
WOW! just Wow! Love this tutorial!
Ashlee
Thanks! It was a really fun one to make!
Abbie
Your cakes are beautiful! I am doing my first doll cake, an Elsa doll for my daughters 5th birthday. Can you help me…
I have the wondermould pan, is it easy to push a doll with legs in? I’m worried my cake will collapse or the fondant will tear as I push it in.
Do I need an 8 it 9 inch round underneath for height? Can I cut the cake in half and fill with buttercream or might it be very difficult? Any tips welcome!!
Many thanks in advance
Ashlee
don’t use a box cake, it breaks too easily. and because the dolls have legs it def needs an extra layer underneath. i wouldn’t fill it with buttercream, it would make it too unstable and wiggly. I ONLY use ganache under fondant and in my shaped and carved cakes for stability. i just did an elsa and anna cake for my daughter and I’ll be posting my tutorial soon.
grethel
Awesome love it
Ashlee
Thank you so much! This is still one of my favorites!
Emily
This is an amazing cake. Simply Beautiful. My daughter wants a Merida party for her Golden 6th Birthday so when I found your post, I was in love. My only question is, do you make your own fondant? How did you get the perfect color? I have made my own and I use the Americolor brand colors.
Emily
Ashlee Marie
I use satin ice fondant – I buy my fondant in colors and tweak them with gel dye